Tips to Help You Control Moisture and Mitigate the Risk of Flooring Failure
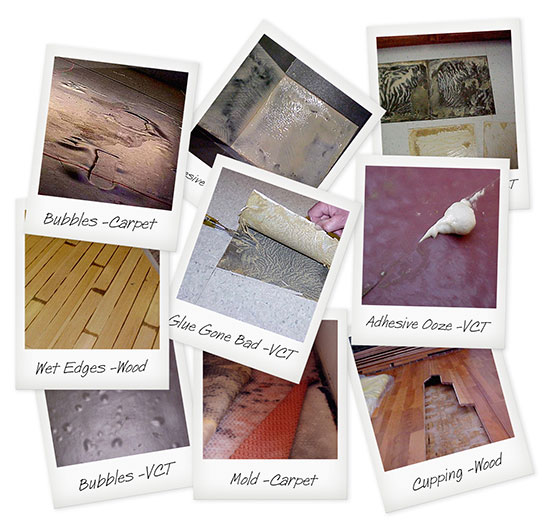
When it comes to floor coverings, moisture problems are all too common. It doesn’t matter what type of flooring we’re talking about — wood, carpet, vinyl, tile, or something else — if water vapor inside the concrete makes it to the surface, you’re going to have big problems.
This is because as moisture deep in the concrete rises to the surface, it brings along with it soluble alkalis that raise the pH level and break down adhesives. You end up with swelling, blistering, cupping, etc.
In North America, flooring failures cost billions annually to fix. Fortunately, they’re easy to avoid if you understand the moisture dynamics of concrete slabs and conduct moisture measurement of every floor installed over a slab.
History of Concrete Moisture Testing
Two main ways have been used to perform concrete moisture readings:
- the calcium chloride (CaCl) test (ASTM F1869) that was improvised in the 1940s
- the in situ relative humidity (RH) test (ASTM F2170) which today is the most reliable method for testing concrete moisture levels
We’ll go into more detail about the CaCl test and the in situ RH test below.
How Concrete Dries
Concrete is poured wet and as it releases water vapor, it dries. According to the Portland Cement Association, every one inch of concrete slab takes around 30 days to dry on average. Of course, this assumes an environment with low RH and a consistently warm temperature.
We should note here that curing is not the same as drying. Curing is the hardening process that starts immediately after pouring. It’s complete after about 28 days. However, concrete will continue to harden for some time afterward as well.
It’s important to remember that just because a concrete slab looks dry, doesn’t mean it is. There’s still huge amounts of water that must evaporate out if you don’t want it impacting your floor. This is why moisture testing is essential.
Tip #1 – Use the Most Reliable Moisture Test
The two most widely used concrete moisture tests today are the CaCl test and the in situ RH test. But, which one is the most reliable?
The CaCl (ASTM F1869) concrete moisture test was an industry-standard that was created around the 1940s. The problem is there’s no science behind it and it only measures the top ½-¾ inch of the slab. What if there’s moisture deeper in the slab? The CaCl test won’t detect it and if when it rises to the surface, you’ll have problems.
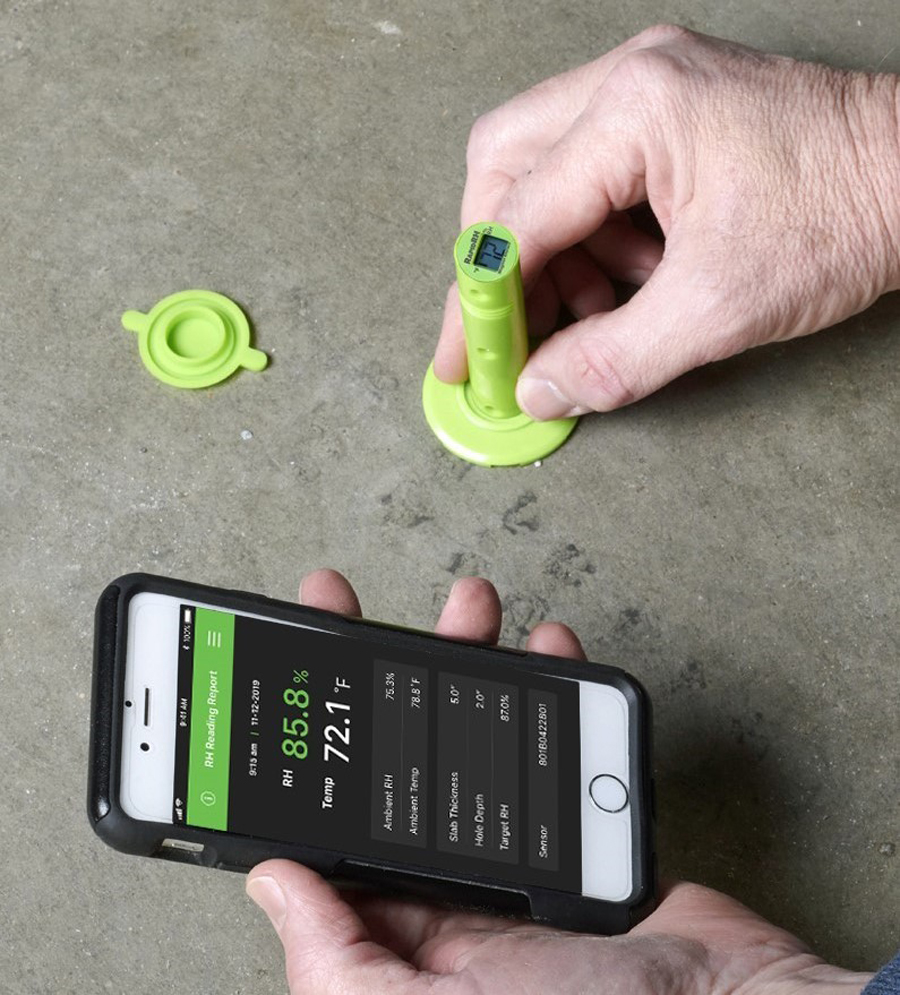
In contrast, the in situ RH test (ASTM F2170) provides you with information about the moisture condition deep within the slab. It’s also backed up by scientific research. You can use a pinless moisture meter to find out where to place the probes (see ASTM F2659).
Tip #2 – Ensure Complete Compliance with Whichever ASTM Standard You Use
The ASTM F2170 standard states that probes must have NIST-traceable calibration equal to or better than plus or minus 2% RH when the RH is between 50-90%. While other in situ test systems come close, the sensor used in the Rapid RH L6 fully complies with this standard. Other sensors may not meet these criteria.
Tip #3 – Ensure That You Are Using the Appropriate Equipment for the Test That You Are Employing
 Even the best test or tool can produce inaccurate results if used improperly. For example, the sensors on the Rapid RH L6 could be damaged if you do not properly push them into the concrete. Another example of improper use of the Rapid RH L6 would be not placing the cap on the sensor. This could allow dirt or other contaminants to get into the sensor.
In both of these cases, you’ll probably not get an incorrect reading; or just no reading at all, and you would have to perform the test again. So make sure you follow installation guidelines.
Tip #4 – Closely Monitor Ambient Conditions — Even If You Can’t Be There
Although it isn’t mandatory, we highly recommend you monitor ambient conditions on the job site in order to avoid unpleasant surprises.
The Wagner Meters’ Smart Logger is an ambient RH and temperature data logging device that utilizes Bluetooth technology. It’s very small so you can easily hide it somewhere on the job site. This way you’ll be able to monitor, document, and store ambient RH and temperature data, even when you’re not there.
Tip #5 – Follow the Manufacturers Specifications Closely
It goes without saying that you need to faithfully follow the floor covering manufacturer’s specs regarding optimum moisture conditions in the concrete slab. You can see a list of them at rhspec.com.
Visit wagnermeters.com for more information about products and access to an extensive library of educational videos.